SWEDAPL Meeting in Malmö, November 11th 2015

The November cycle of APL User Meetings is kicking off; the SWEDAPL meeting in Malmö was first this year, holding a meeting at the top of the famous Turning Torso in Malmö. Since it was just a short trip from our Danish office, Dyalog was represented by Gitte Christensen, Bjørn Christensen and Morten Kromberg – with Brian Becker and Dan Baronet joining the meeting remotely. Next week, Richard Smith and Nick Nickolov will be representing Dyalog at APL Germany in Erfurt and Dan Baronet at FinnAPL in Helsinki – check http://dyalog.com/dates-for-your-diary.htm periodically for a list of APL meetings and Dyalog presentations!

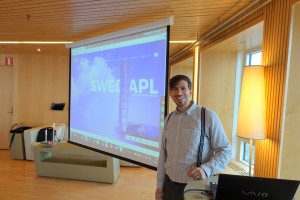
Gilgamesh Athoraya welcomes us to SWEDAPL

Gilgamesh Athoraya welcomes us to SWEDAPL

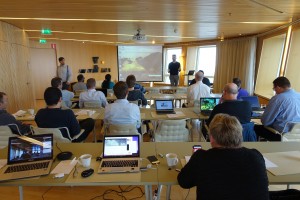
This turned out to be a very international group – ten Swedes (two of whom were from India but based in Göteborg), six Danes who made the trip across the sound, two from the UK, one German and one delegate from each of Serbia and the Ukraine – plus about five North Americans who joined the afternoon sessions via GoToMeeting. This was the first “themed” SWEDAPL meeting; all of the talks were related to the use of Web Services in APL.

First up was our host Gilgamesh Athoraya from Data Analytics in Malmö, who showed us how he had been using Paul Mansour’s new RUMBA application interface which is built on top of Dyalog’s TCP toolkit (which is known as CONGA). Gil has been experimenting with support for Web Sockets, which are bi-directional connections that allow the server to push data to web client applications, making it possible to have very responsive user interfaces in web applications.

Joakim Hårsman explaining how slippery SOAP can be

Joakim Hårsman explaining how slippery SOAP can be


The next presentation was by Joakim Hårsman of CompuGroup Medical, who have been exposing data held on IBM AIX servers via Microsoft.NET-based Web Services for many years. Joakim had a few interesting stories to tell about getting a grip on and maintaining Web Services based on the protocol known as SOAP, which is supposed to make this easy…

The last talk before lunch was by Stephan Poßberg of Vallourec, who talked about the use of Web Services to make computational code available across a large, global organisation. Lunch was served on the 54th floor; unfortunately the weather didn’t quite allow us to see all the way to Helsingør.

The Turning Torso in the Mist, After Dark

The Turning Torso in the Mist, After Dark

After lunch, it was Morten’s turn, assisted by Brian Becker (who joined the meeting from Rochester NY) to present Dyalog’s brand new support for RESTFul web services, available in MiServer 3.0. Paul Mansour also joined this session and provided valuable insights into REST technology, which seems to be taking over as the preferred Web Service architecture for new applications.

Finally, Peter Simonsson from Aplensia in Göteborg told us how Web Services had become widespread at Volvo Cars, where a couple of hundred APL-based services provide the backbone of a network of applications centered around product data and production planning – with the earliest web services dating back to the days when APL ran under VM on IBM Mainframes.

Many thanks to Gilgamesh, Data Analytics and Optima Systems for arranging this event, which provided much food for thought, and inspiration for future work by several people at Dyalog – and by the sound of it, a number of users of APL as well! Expect to see more support for Web Services and Sockets in future versions of Dyalog products!

Over the Moon with Selenium

Over the years, I have become more and more reluctant to write code without good regression tests – 35 years of software development have taught me that it is just too dangerous! Regression testing of user interfaces has always been difficult, but for the last few weeks I have been working with technologies that put user interface testing within easy reach: HTML and the Selenium WebDriver, which star in the following video (if you can wait, read the full story below the video before watching):

This is exciting – I hope you can see why I am “over the moon” (apart from Selene being the Greek Moon Goddess).

Modern Markup Languages

One of the good things about modern User Interfaces based on markup languages like HTML is that logical information about the user interface is available at runtime. For example, a browser displaying HTML maintains a “Document Object Model” of the web page. The content and other attributes of each element within the DOM can be inspected and manipulated at runtime by a testing tool – this is what Selenium does.

Selenium

Selenium is a widely used open-source tool for automating browsers, with growing support from browser vendors. Selenium provides an API that allows you to perform just about any operation that a user could: click on buttons and select items from drop-downs, press keys to enter text, drag and drop items, or perform exact mouse movements and different types of clicks. Over the last few weeks, we have been working on a some thin covers for Selenium to make it easy to drive browsers from Dyalog APL. At the moment we require the Microsoft .NET bindings and can only do the testing from Microsoft Windows. The web server can be running anywhere, and we hope to add other client platforms in the future.

The results of this work are now available in the GitHub Repository Dyalog/Selenium. The following example, included in that repository, shows a simple test which verifies that the TryAPL website is able to execute a simple expression:

 ∇ r←Basic;S;result
 ⍝ Basic test that TryAPL is working - return error message if it isn't
 
 S←##.Selenium
 S.InitBrowser''
 S.GoTo'http://tryapl.org'
 
 'APLedit'S.SendKeys'1 2 3+4 5 6'
 S.('APLedit'SendKeys Keys.Return)
 result←'ClassName'S.Find'result'
 r←result S.WaitFor'5 7 9' '1 2 3+4 5 6 failed'
 ∇

MiServer Regression Testing

The primary motivation for this work has been to create regression test scripts for MiServer version 3.0. The MiServer regression testing mechanism is extremely simple (possibly a bit TOO simple, we’ll cross that bridge later): If a site contains a folder called “QA”, and the folders within mirror the structure of the web site, then a mechanism exists to load each page in turn and run the corresponding test function. You can read more about it on GitHub and see it working in the video at the top of this post.

Building a Web Application with MiServer

IMG_4875
One of Sunday’s tracks was Brian Becker’s engaging workshop on MiServer 3.0 – the newest version of Dyalog’s APL-based web application framework that allows you to develop a cross platform application for stand-alone use or delivery via the web.

The motto of MiServer is that everyone who can develop an APL application should also be able to make it available via the web, allowing users to access the application via their favourite browser. In other words, MiServer is browser and platform agnostic.

The main take-away from the morning’s workshop is that if you are used to developing your GUI using ⎕WC, developing the GUI in MiServer 3.0 creates some slightly different rules. First we were showed where to download MiServer, and then Brian guided us though building out very first one-page website. The interactive nature of the workshop captivated us all. Before we knew of it, it was time for lunch.

IMG_4869After lunch – instead of having a sleep inducing talk, Brian challenged us to build a website for a Big Brian’s Burger Bistro offering ordering facility for various products with side orders, and a dashboard to monitor the ordering, product category, speed of order processing, and – most importantly from a management point of view – keep an eye on revenue and which products generate most revenue, with auto update when new orders where processed and paid.

It may have been down to the eating habits of the delegates in terms of their love for burgers, fries etc., but the enthusiasm with which we attacked the challenge was probably more due to how Brian managed to whip up and present MiServer 3.0’s capabilities during the morning. Actually, we got so engrossed in the afternoon that we almost missed our coffee break!

A group of participants was tasked with creating a dashboard, and after some discussion decided on two tables, which would pull data from the business logic, do a bit of calculation, and auto update when new orders got processed.

Hugely entertaining, and we actually managed – courtesy of Rick Proctors swift keyboard handling and deep understanding of APL – to get the code for the dashboard done, working and showcased before we ended the workshop.

We are all looking forward to the MiServer UI Controls presentation on Tuesday morning where we will get a chance to see some the many fancy widgets that MiServer 3.0 offers.


APL-Controlled Robot Performs Death-Defying Stunts Using PiCam

Regular readers will remember my whining about the poor precision of both infra-red and ultrasonic sensors. But today, the Raspberry Pi / Dyalog APL – controlled “DyaBot” was observed driving on a dinner table – where the slightest navigational error could mean a 3-foot plunge and certain death! How can this be?

The answer is: the “PiCam” finally arrived last week!!!

Capturing Images with The PiCam

I no longer need to complain about sonar beams being up to 30 degrees wide: the PiCam has a resolution of up to 1080×1920 pixels! So all we need is some software to interpret the bits…First, we capture images using the “raspistill” command:

raspistill -rot 90 -h 60 -w 80 -t 0 -e bmp -o ahead.bmp

The parameters rotate the image 90 degrees (the camera is mounted “sideways”), set the size to 60 x 80 pixels (don’t need more for navigation), take the picture immediately, and store the output in a file called “ahead.bmp”. (Documentation for the camera and related commands can be found on the Raspberry Pi web page.) Despite the small number of pixels, the command takes a full second to execute – anyone who knows a way to speed up the process of taking a picture, please let me know!

In the video, each move takes about 3 seconds, this is simply because each cycle is triggered by a browser refresh of the page after 3 seconds. Capturing the image takes about 1 second, the “image analysis” about 40 milliseconds, so we could be driving a lot faster with a bit of Javascript on the client side (watch this space).

Extracting BitMap Data

Under Windows, Dyalog APL has a built-in object for reading BitMap files, but at the moment, the Linux version does not have an equivalent. Fortunately, extracting the data using APL is not very hard (after you finish reading about BMP files on WikiPedia):

tn←'ahead.bmp' ⎕NTIE 0     ⍝ Open "native" file
(offset hdrsize width height)←⎕NREAD tn 323 4 10 
                           ⍝ ↑↑↑ Read 4 Int32s from offset 10
data←⎕NREAD tn 80 (width×height×3) offset ⍝ Read chars (type 80)
data←⊖⎕UCS(height width 3)⍴data ⍝ Numeric matrix, reverse rows

The above gives us a 60 by 80 by 3 matrix containing (R,G,B) triplets. This code assumes that BMP file is in the 24-bit format created by raspistill; I will extend the code to handle all BMP formats (2, 16 and 256 colours) and post it when complete – but the above will do for now.

Where’s the Edge?

At Iverson College last week, I demonstrated the DyaBot driving on a table with a green tablecloth, using code which compared the ratio between R,G,B values to an average of a sample of green pixels from one shot. Alas, I prepared the demo in the morning and, when the audience arrived, there was much more (yellowish) light coming in through the window. This changed the apparent colour so much that the bot decided that the side of the table facing the window was now unsafe, and it cowered in the darkness.

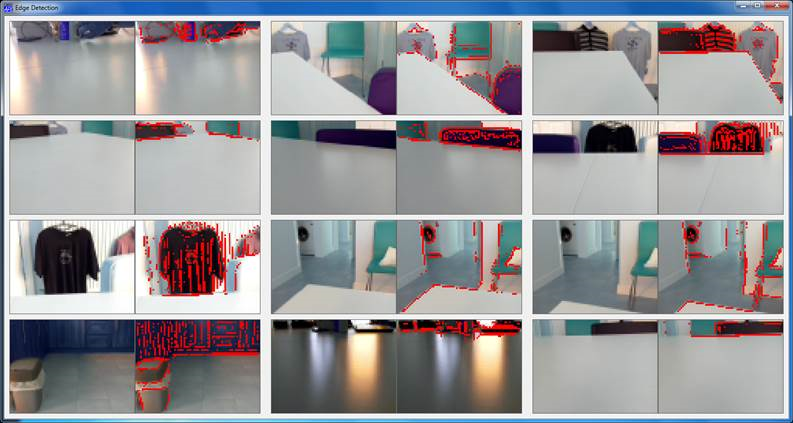
Fortunately, I was talking to a room full of very serious hackers, who sent me off to Wikipedia to learn about “kernels” as a tool for image processing. Armed with a suitable edge detection kernel, I was able to test this new algorithm on a dozen shots taken at different angles with the PiCam. Each pair of images below has the original on the left, and edges coloured red on the right. Notice that, although the colour of the table varies a lot when viewed from different directions – especially when there is background glare – the edges are always correctly identified:

Edge Detection Examples

Except for the image at the bottom left, where the bot is so close to the edge that the table is not visible at all (and the edge is the opposite wall of the room, ten feet away), we seem to have a reliable tool.

The PiServer Page

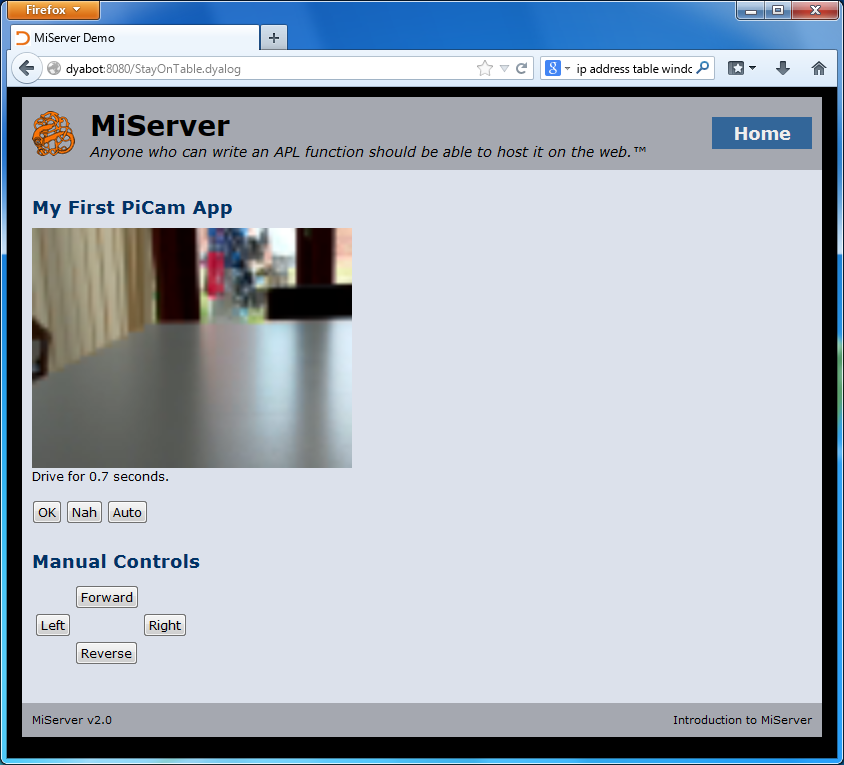
The code to drive the bot is embedded in a “PiServer” (MiServer running on a Rasperry Pi) web page. Each refresh of the page takes a new picture, extracts the bits, and calls the main decision-making function. The suggested action (turn or drive straight ahead) is displayed in the form, and the user has the choice of pressing OK to execute the command, pressing the “Nah” button to take a new photo and try again (after moving the bot, changing the lighting in the room, or editing the code). There are also four “manual” buttons for moving the Bot. After testing the decision-making abilities of the code, brave programmers press the “Auto” button, allowing the robot to drive itself without waiting for confirmation before each command (see the video at the start of this post)!

Robot Views Table at Dyalog House

The Code

The central decision-making function and the kernel computation function are listed below. The full code will be uploaded to the MiServer repository on GitHub, once it is finally adjusted after I find a way to attach the PiCam properly, rather than sticking it to the front of the Bot with a band-aid!

∇ r←StayOnTable rgb;rows;cols;table;sectors;good;size;edges
 ⍝ Based on input from PiCam, drive at random, staying on table
 ⍝ Return vector containing degrees to turn and 
 ⍝               #seconds to drive before next analysis

 (rows cols)←size←2↑⍴rgb
 ⍝ First detect edges in each colour separately
 edges←EdgeDetectAll∘AK¨⊂[1 2]rgb
 ⍝ Call it an edge if any r, g or b result is >75% of original
 edges←∨/(↑[0.5]edges)>0.75×1 1↓¯1 ¯1↓rgb
 ⍝ Look for lowest edge in each column 
 table←+⌿∧⍀~⊖edges
 ⍝ Divide into 3 equally sized sectors (left, centre, right) 
 sectors←((⍴table)⍴(⌈(⍴table)÷3)↑1)⊂table
 ⍝ Find the LOWEST edge in each sector
 good←⌊/¨sectors

 :If good∧.>15 ⍝ More than 15 pixel rows of table in all sectors
    r←0,0.1⌈(good[2]-15)÷25 ⍝ Carry straight on for a while
 :Else ⍝ Some sectors have less than 15 pixel rows
    :If 0≠1↑previous ⋄ r←previous 
        ⍝ Once started turning, keep turning the same way
    :Else 
        r←((1+>/good[1 3])⊃45 ¯45),0 ⍝ Turn in "best" direction
    :EndIf
 :EndIf
 previous←r ⍝ Remember last turn for next decision
∇

The function AK (Apply Kernel), and the kernel are defined as follows:

∇ r←kernel AK data;shape
   shape←⍴kernel
   r←(1-shape)↓⊃+/,kernel×(¯1+⍳1↑shape)∘.⊖(¯1+⍳1↓shape)∘.⌽⊂data
∇

 EdgeDetectAll ⍝ Our 3x3 kernel
¯1 ¯1 ¯1
¯1  8 ¯1
¯1 ¯1 ¯1

Note the similarity of AK to the APL Code for Conway’s Game of Life!


PiServer at Thor8.dk

I’ve been wanting to run a Web Server from my home for many years. In fact, I have been paying for the domain Thor8.dk (my street address is Thorsvænget 8), and a fixed IP address for 5 years now – without getting it implemented. But today, with a little help from Jason Rivers who helped me set it up so it starts automatically on reboot, I have been able to deploy a MiServer – a web framework written entirely in Dyalog APL – on my Raspberry Pi (the one that is not embedded in the DyaBot) – at the address http://thor8.dk. Please be gentle with it, it is a very small machine on a regular ISP connection with only 1Mb upload capacity!

MiServer + Raspberry Pi = PiServer

The MiServer is a project that has been evolving for the last several years, with the goal of putting web application development in easy reach of those APL developers who are not also comfortable with mainstream web technologies like Microsoft IIS / ASP.NET, Apache, PHP etc. It is a web framework written entirely by APLers, for APLers – as an open-source project which is now available at https://github.com/Dyalog/MiServer. The motto of this project is that “Anyone who is able to write an APL function should be able to host it on the web”.

The site at “thor8” is a slightly modified version of the demo site that is included with the MiServer installation. Note that one of the features of the site is that, from any page, if you click on the Viking amulet in the top left corner, you can see the source code for the page. If you’d like to learn more about the MiServer, the User Guide is also available on GitHub.

The Mortgage Example

A contributing factor to my finally getting my act together this week is that Nick Nickolov’s NGN/APL project, is an APL interpreter written in CoffeeScript, sparked a thread that has been running on LinkedIn for a while, which included a discussion on alternative mechanisms for implementing web apps in APL. While I think Nick’s project is very cool, and I look forward to meeting him at Iverson College next week, I could not avoid feeling a powerful urge to demonstrate that it now straightforward to write interactive web sites using a state-of-the art, industrial strength APL system. Many thanks to Brian Becker, who has done most of the work on recent features of the MiServer (and is currently working on MiServer 3.0 which aims to make the development of web pages much more similar to desktop application development), for his assistance in putting together the example.If the PiServer is still up and running you can view the example at http://thor8.dk/mortgage. Here is an image, just in case it isn’t:
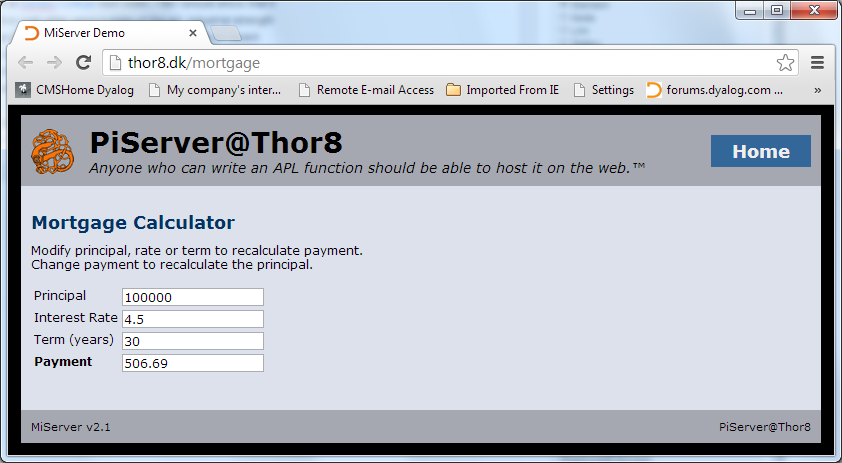
PiServer Mortgage

If you modify the principal amount, interest rate or the term, the calculator will calculate a new monthly payment. If you adjust the payment to something that you can afford, the principal amount will be adjusted accordingly.

The Code

As previously mentioned, if you click on the orange amulet at the top left, the code for the page will be displayed. I’d like to explain selected lines of the code here:

:Class mortgage : MiPage

Every MiServer Page (MiPage) is a Dyalog APL class which derives from the base class MiPage. This base class adds the CSS (style sheet) and behaviour like the display of code.

Public Fields

    :Field Public event         ⍝ the triggered event
    :Field Public what          ⍝ the id of the element
    :Field Public prin←'100000' ⍝ principal field
    :Field Public rate←'4.5'    ⍝ rate
    :Field Public term←'30'     ⍝ term (years)
    :Field Public pmt←''        ⍝ payment

The main job of the MiServer is to move values arriivng from the browser, in the form of fields in an HTML form, or JSON data, to instance variables in your class. You need to name the fields that you want the MiServer to look for in order for this to happen (you can also retrieve other values using API function calls, but that is a longer story).

Application Code

tonum←{{(,1)≡1⊃⍵:2⊃⍵ ⋄ ''}⎕VFI ⍵} ⍝ check for a single number
calcpmt←{0::'Err' ⋄ p r n←⍵÷11200(÷12) ⋄ .01×⌈100×p×r÷1-(1+r)*-n}
calcprin←{0::'Err' ⋄ r n m←⍵÷1200(÷12)1 ⋄ .01×⌈100×m÷r÷1-(1+r)*-n}

These three lines of code are the actual application code – one function to compute the payment based on principal, rate and term – and another to calculate the principal based on the other three values.

Defining The Form

 inputs←1 2⍴'Principal'('prin'Edit prin) 
 inputs⍪←'Interest Rate'('rate'Edit rate)
 inputs⍪←'Term (years)'('term'Edit term)
 inputs⍪←'<b>Payment</b>'('pmt'Edit pmt)
 html,←'id="mortgage"'('POST'Form)Table inputs

Within the function Render, which is called when the page is rendered, these lines of code create a 4×2 nested array containing labels in the first column, and HTML edit fields in the 2nd column. The function Table wraps an HTML table around this array and the Form operator wraps that inside a form which will use the POST method (although in this case, that actually never happens, we drive all activities of change events on the edit fields).

Wiring up the Callbacks

  selector←'#mortgage input'
  event←'change'
  returndata←'formdata' '#mortgage' 'serialize'
  html,←req #.JQ.On selector event returndata

These four lines of code set up a client-side JavaScript callback using a technology called JQuery, which will post a serialised copy of the form back to the server using an “AJAX” style transaction (we call it “APLJAX”). In a larger form we might want to be more selective about what we send back, but in this case the entire serialised form is still a very small amount of data.

Updating the Form

    :CaseList 'prin' 'rate' 'term' 
       resp←('execute'('$("#pmt").val("',(⍕calcpmt p r n),'")'))
    :Case 'pmt' ⍝ payment changed, calculate principal
       resp←('execute'('$("#prin").val("',(⍕calcprin r n m),'")'))

The above lines are “the beef” in terms of the interaction: A response is constructed which will cause the value of either the pmt or the prin field to be updated, by sending a snippet of JavaScript back to the client to be executed dynamically.

We are actually working hard to eliminate the use of the above feature (the ability to execute JavaScript), because we don’t think most APLers will want to learn even this amount of JS. If you can make do with two buttons marked “Calculate payment” and “Adjust Principle”, rather than reacting each time a field is changed, no JS is required – as is the case for most of the other MiServer sample pages. Version 3.0 of MiServer will hopefully have a mechanism to update values of selected parts of the DOM without injecting JS. However, this example should hopefully demonstrate that you can write an APL server-side application which does *anything* using this technology.

Please take it for a spin – we are happy to receive comments on this blog, or via e-mail to apltools at dyalog dot com.

The DyaBot will of course be running a PiServer too. More about that next week, the bot is also coming to Iverson College.